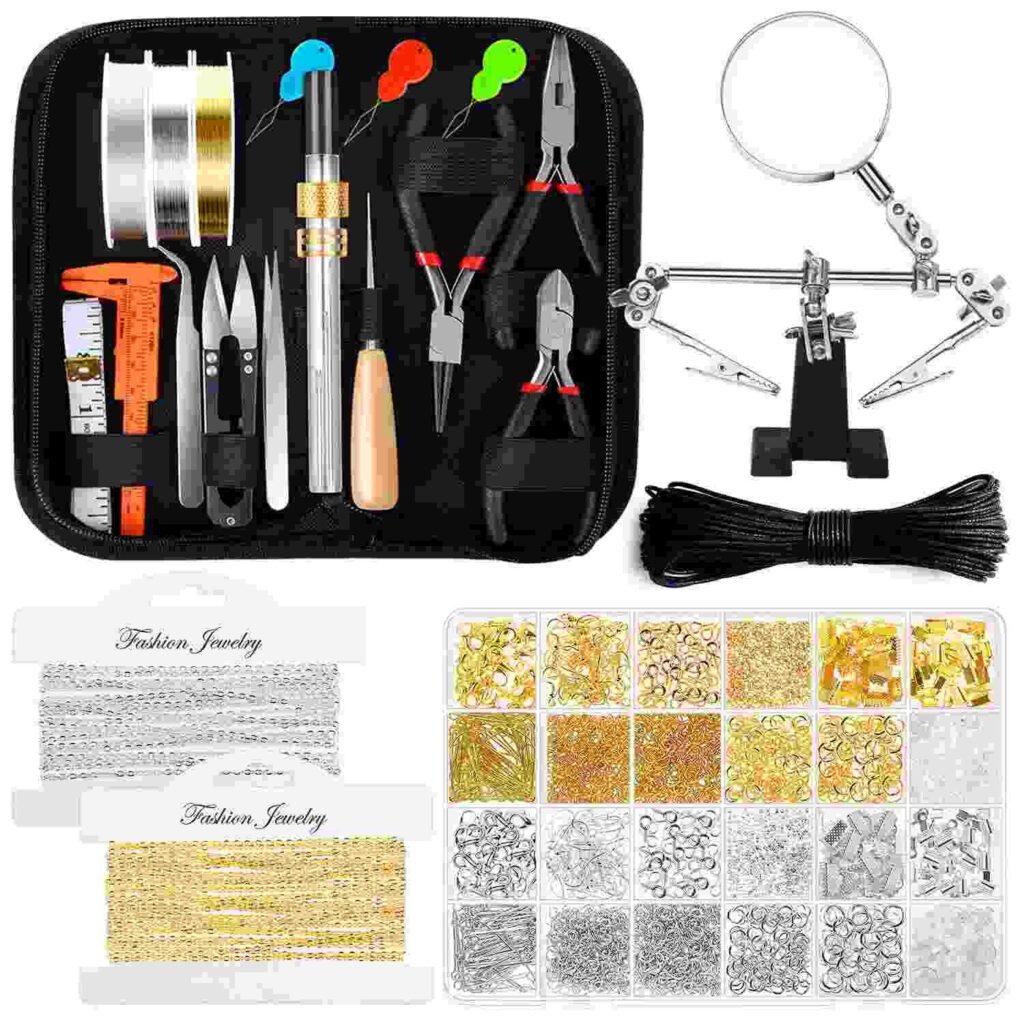
Creating your own jewelry at home is a fun and rewarding hobby that allows you to express your creativity while designing unique pieces. With the right craft gadgets, you can produce stunning necklaces, bracelets, earrings, and rings with ease. Whether you’re a beginner or an experienced jewelry maker, this guide will introduce you to essential tools and techniques to elevate your DIY jewelry-making experience.

Essential Craft Gadgets for DIY Jewelry Making
1. Jewelry Making Kit
A complete jewelry-making kit is perfect for beginners. These kits typically include pliers, wire cutters, jump rings, clasps, and beads, giving you everything you need to get started.
2. Bead Spinner
A bead spinner is a must-have tool if you work with small beads. It speeds up the threading process, making intricate designs easier to achieve.
3. Jewelry Engraving Pen
Personalize your creations with an engraving pen. You can etch initials, patterns, or custom designs onto metal pendants and charms.
4. Resin Jewelry Kit
Resin kits allow you to make custom pendants and earrings by embedding flowers, glitter, or other tiny objects in clear resin molds.
5. Soldering Iron for Jewelry
A soldering iron helps in fusing metal pieces, making it a great tool for creating wire-based designs or repairing broken jewelry.
6. UV Resin Curing Lamp
If you’re working with UV resin, a curing lamp quickly hardens the material, allowing you to craft high-quality jewelry pieces in minutes.
7. Jewelry Wire Wrapping Tools
Wire wrapping pliers and tools allow you to create intricate designs with metal wire, perfect for making rings, pendants, and earrings.

Step-by-Step Guide to Making Your Own Jewelry
Step 1: Choose Your Design and Materials
Decide what type of jewelry you want to make—beaded bracelets, resin earrings, or wire-wrapped pendants. Gather the necessary materials such as beads, metal findings, resin, or wire.
Step 2: Prepare Your Workstation
Set up a clean and well-lit workspace with all your tools organized for easy access.
Step 3: Start Assembling Your Jewelry
If you’re making beaded jewelry, use pliers to attach clasps and hooks.
For resin jewelry, pour the resin mixture into molds and cure it under a UV lamp.
If using wire-wrapping techniques, shape the wire with pliers to create unique designs.
Step 4: Add Finishing Touches
Polish metal pieces, engrave designs for personalization, or add a protective resin coat to secure embellishments.
Step 5: Store or Showcase Your Creations
Keep your jewelry in an organized storage box or display them in an aesthetically pleasing manner if you’re selling or gifting them.
Final Thoughts
Making jewelry at home is a fantastic way to express your artistic side while creating meaningful pieces. With the right craft gadgets, you can take your DIY jewelry-making skills to the next level. Explore these tools and start designing your unique jewelry today!